
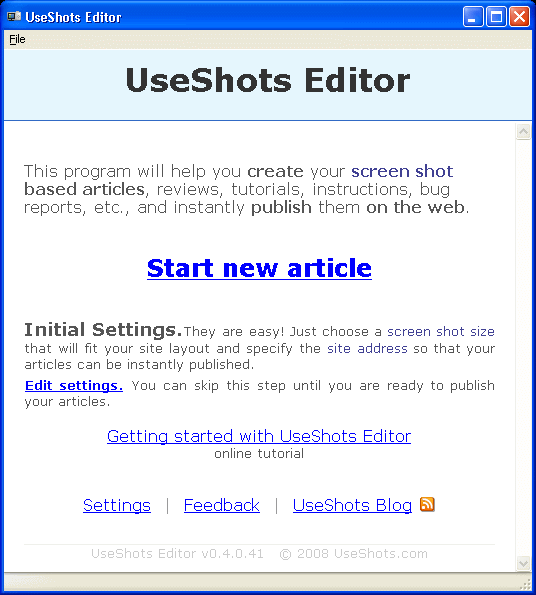
Getting Started with UseShots Editor.
February 22nd, 2008 Posted in Tutorials, UseShots Editor, UseShots Samples На русском1. Introduction
Requirements:
1. You need an active WordPress blog, where you have permission to post articles. If you don’t have one, you can sign up for a free WordPress.com hosted blog (btw, they provide 3Gb of space for uploads now.)
2. You need to download and install UseShots Editor (only Windows version at this moment).
BTW, this whole tutorial has been created and published using UseShots Editor.
2. Let’s start
3. New Article
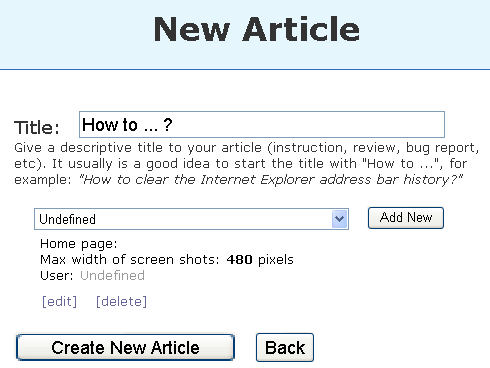
If this is the first time you use UseShots Editor, you don’t have any site profiles yet, so just leave the “Undefined” profile for now. We’ll have a chance to configure the site profile later.
Note that in the “undefined” site profile, a maximum width of screen shots is 480 pixels, which means that larger images will be automatically resized to fit the blog’s column width ( 480 pixels is the width that fits many WordPress themes).
You might want to create a site profile straight away if your blog’s column width is narrower than 480 pixels and you don’t want larger screen shots to break your site layout. Or if the column width is significantly wider and you want screen shots that are wider than 480 pixels but still fit the column’s width to be saved without resizing to preserve the best quality of screen shots.
To create a new site profile, click the “Add New” button. Creating site profiles is covered in the step 10 of this tutorial.
4. The First Screen
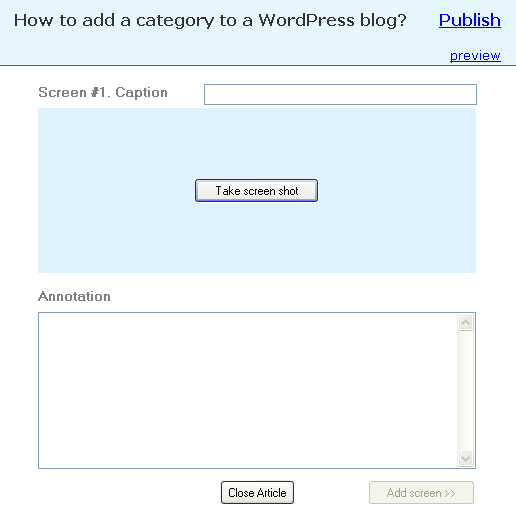
Each screen consists of
1. Caption - a short description of the screen. It will be displayed as a sub header in your blog.
2. Screen shot - the picture itself
3. Annotation - a textual description of the screen. Write your instructions, reviews, anything else here - you are the author.
The first thing you might want to do is take a screen shot. Just click the Take screen shot button in the center of the screen.
5. UseShots Camera
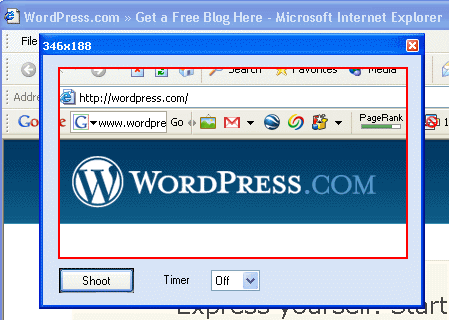
It works the same way as your digital camera. You can click-and-drag it all over your screen and everything inside the red frame will be captured when you hit [Enter] on your keyboard or press the “Shoot” button.
You can resize the camera window as any other window - just click-and-drag its boarders and corners. This way you can capture an arbitrary area of the screen.
And you don’t have to worry about the size of the screen shot. It will be automatically resized to fit your blog’s layout.
At the upper left corner of the camera window, you will see the dimensions (width x height) of the captured area.
6. Completing Screen Information
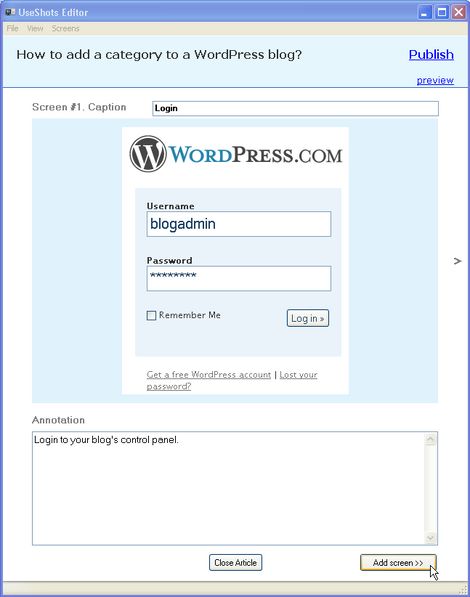
Give it a descriptive caption. (These captions will also be used as alt parameters of img tags when the article is published. )
Add a textual description of the screen in the Annotation edit box.
Although it is recommended that you enter captions and annotations, they are optional. Even screen shots are optional.
To add a new screen to your article click the Add Screen >> button at the lower right corner of the editor.
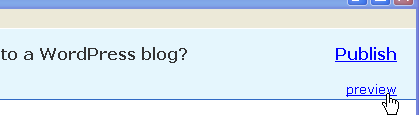
7. Preview Link
8. Preview
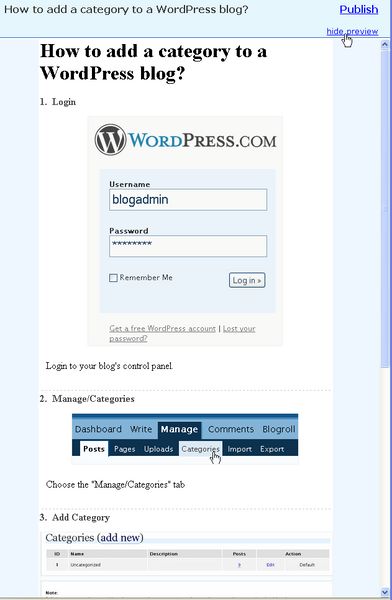
Note: the actual look of the published article will depend on your blog’s theme settings.
To close the preview mode, click the hide preview link at the upper right corner.
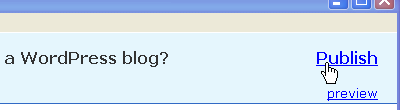
9. Ready to Publish
10. Site Profile
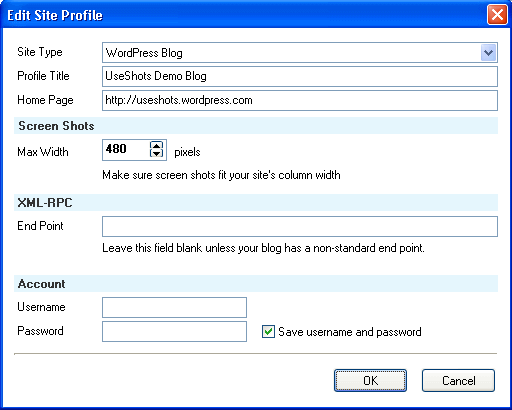
Site Type - only WordPress blog at this point.
Profile Title - title that will help you identify the profile among other available profiles.
Home Page - your blog’s homepage (e.g. http://myblog.wordpress.com)
Max Width - maximum width of screen shots that will fit your blog’s column without resizing. Wider screen shots will be automatically resized.
XML-RPC end point - you can leave this field blank (recommended) unless your blog has a non-standard endpoint.
You can leave out the login details at this point, you will be promted for username/password when you publish the article.
If the “Save username and password” option is checked, the login details will be saved, and you won’t need to specify username/password next time you open UseShots Editor.
11. Title and Tags
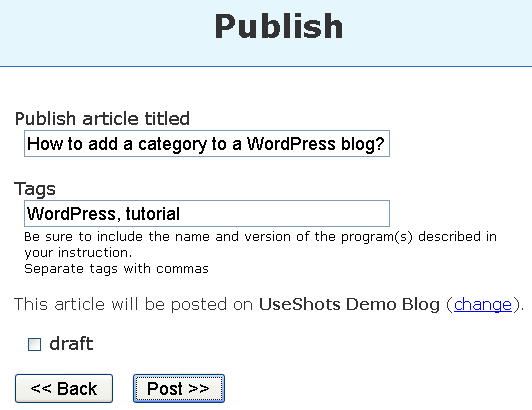
Add some descriptive tags to your article. Separate tags with commas.
If you check the draft option, the article will not appear on your site. It will be saved as a draft. You will need to specificaly publish it in the admin area of your blog.
Click Post >> when ready.
12. Article Published
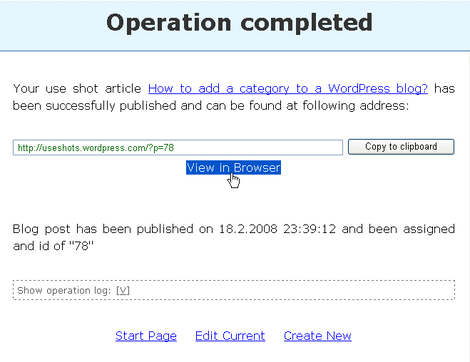
Note: UseShots Editor provides you with WordPress default URLs that should work for any blog regardless of permalink style. You can get the real URL in the browser’s address bar when you open the link in a web browser.
13. Checking the Published Article in a Web Browser
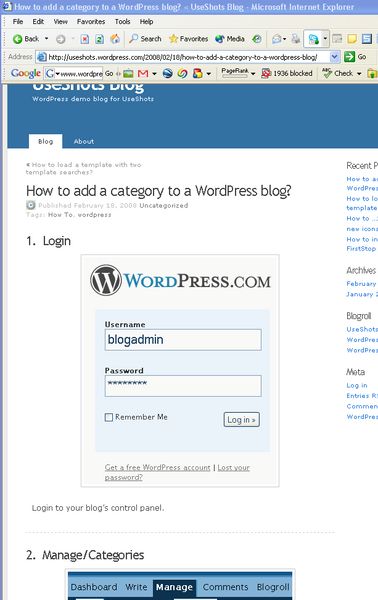
The whole process took less than 5 minutes.
You are ready to create and publish your own screen shot based articles - UseShots.
14. Feedback
Please let me know what you think about UseShots Editor. Leave your comments here or use this form to contact me directly.
And I’d like to see your articles created with UseShots Editor - send me the links.
Thanks!
Did you enjoy this post? Why not leave a comment below and continue the conversation, or subscribe to my feed and get articles like this delivered automatically to your feed reader.


6 Responses to “Getting Started with UseShots Editor.”
By Colin on 2008-05-20
Great piece of software. Never wanted to tackle instructionals before, knowing how much messing around it would be. COuld do one in a few minutes now.
Also could use to transfer from blog to word doc or pdf to make printable instructionals / books.
Thanks!
By Hein Maas on 2008-08-28
Hi, is there a MAC OS X version of USeShots blog editor
By Denis on 2008-08-29
There is only a Windows version so far.
Maybe when UseShots Editor is extremely popular and I get myself a Mac, I’ll have a cross-platform version.